Manage your content with the Recognyze WordPress plugin
This guide explains how to install, configure and use the plugin to recognyze your content and earn rewards from content aggregators.
Overview
Recognyze.AI allows you to register (or “recognyze”) your content, so that you can earn rewards when content aggregators use your work.
Key Features
- Recognyze your WordPress content, identifying it with unique digital signatures.
- Manage all your recognyzed content from a central dashboard.
- Use a secure API key storage with encryption
Requirements
- WordPress 5.0 or higher.
- PHP: 7.0 or higher (7.4+ recommended)
- OpenSSL: PHP extension required for encryption features.
Installation
- Upload the plugin
- Go to Plugins -> Add New in your WordPress admin
- Search for the plugin named “Recognyze.AI”
- Click Install Now then Activate Plugin.
- You will be automatically redirected to the Getting Started page, which guides you step by step through the setup process, also summarized below.
Getting started
Step 1: Get a Publisher Account
- On the Getting Started page, you’ll see Step 1: Get a Publisher account.
- Click the Get a Publisher account button.
- This will open the Recognyze publisher website in a new tab.
- Create an account if you do not have one yet.
- Once you have your account, return to the Getting Started page.

Step 2: Connect Your Site
- On the Getting Started page, find Step 2: Connect
- Click the Connect button
- A form will appear asking for your credentials: email and password.
- Click Connect to submit your credentials
- Your API key will be automatically retrieved and securely encrypted
- You’ll see a success message confirming your connection
Security Note: Your Basic Authentication credentials are only used temporarily to obtain an API key and are never stored. Only the API key is saved, and it’s automatically encrypted using AES-256-GCM encryption for maximum security.
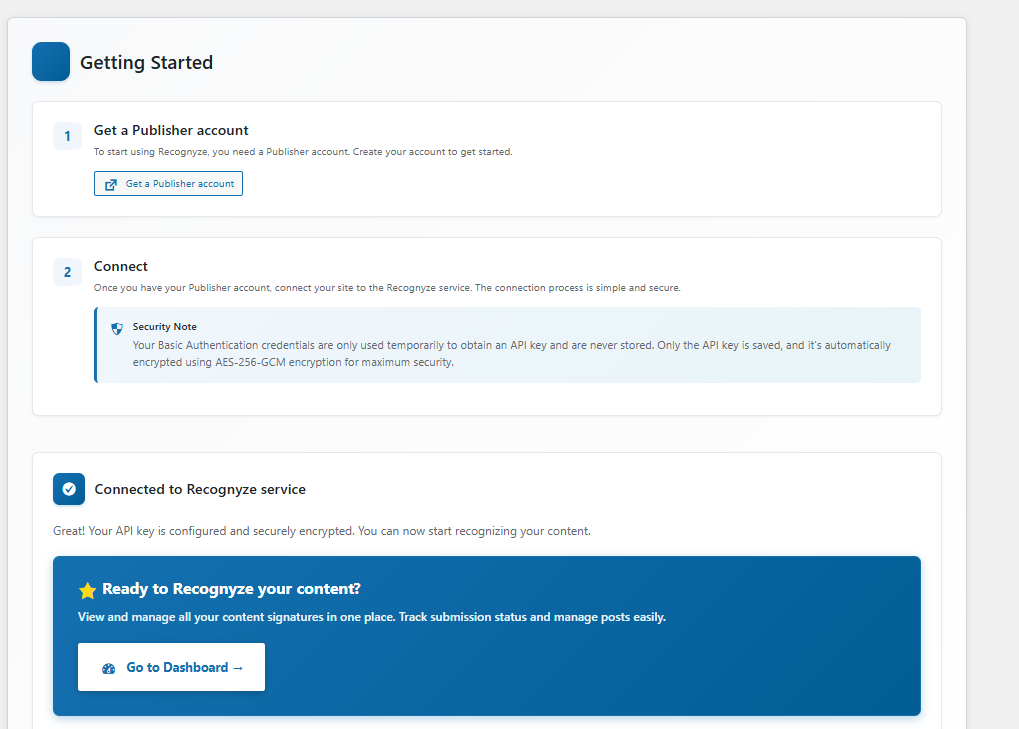
Step 3: Start Using the Plugin
After connecting, you will see the box “Connected to Recognyze service”
- Go to Dashboard: View and manage all your content signatures
You’re now ready to start Recognyzing your content!
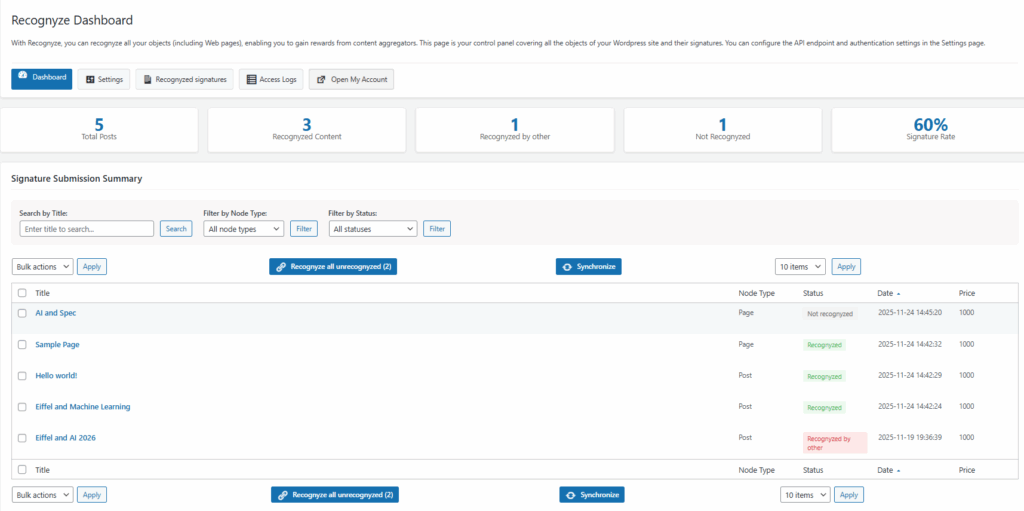
Step 4: Managing signatures from the Dashboard.
- Access Recognyze -> Dashboard
- You’ll see a list of your content with their signature status
- Bulk Actions
- Select multiple items using checkboxes
- Choose an action from the drop-down menu ( Recognyze, Unrecognyze, Update, Sync)
- Click Apply to perform the action
- Individual Actions
- Each item has actions buttons you can use directly
- Each item has actions buttons you can use directly